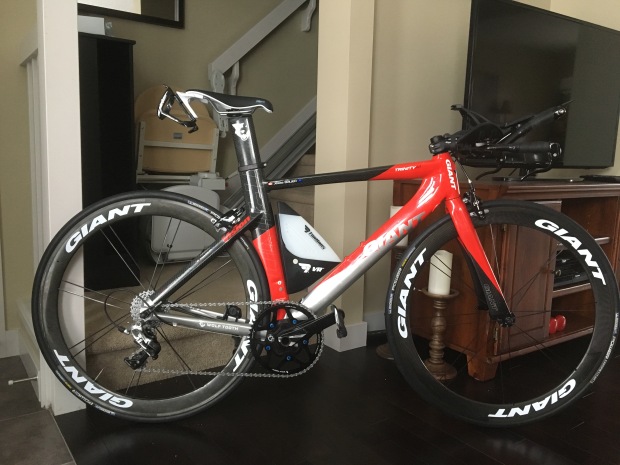
Welcome back! I’m kicking off this blog reboot with a piece on one of my favourite things in the world: my time trial bike. I won my National Championship on a modded out Felt B16 but as my focus shifted to draft legal racing, I sold my Felt and funneled some of the proceeds into my road bike. The rest I earmarked for a new TT bike build, from scratch, where I could try out a few new cycling technologies that are sweeping the world. Hopefully, I could do this on a budget and create something that was both cost-effective and the stuff of my dreams.
As luck would have it, I stumbled on a fantastic deal on Pinkbike. As a sucker for older frame, I was drawn to a 2007 Giant Trinity A1 frame for $500, that came semi-built. After stripping off the parts it came with, I was able to recover some of the purchase price and bring it in under $400. So why this frame?. First, I really wanted to build this bike up with a 1x (single chainring) setup. A substantial amount of drag is generated by the front derailleur hanger, and my need for a small chainring on a TT bike is not that dire. The fact that this Trinity came with a removable front derailleur hanger was a win for me. Not to mention the simplicity!
The second reason is the brand. I have a TON of respect for Giant as a brand. Tom Dumoulin is one of my favourite sports personalities, and has been on a Giant Trinity for many years. Giant supports Team Sunweb, the team in the WorldTour peloton that I most admire due to their commitment to performance and (more recently) clean sport. Giant has also shown an unmatched commitment to women’s cycling, through their Liv Cycling brand. Liv is run unlike any other women’s specific cycling brand, essentially acting as a separate entity with a inventive marketing team and a robust ambassador program. The exposure that Liv has brought to women’s cycling (which is IMO way more exciting and unpredictable than the men’s races, and deserves much more coverage than it gets) is perhaps the biggest reason for my brand loyalty to Giant.
So let’s talk bikes!

COCKPIT
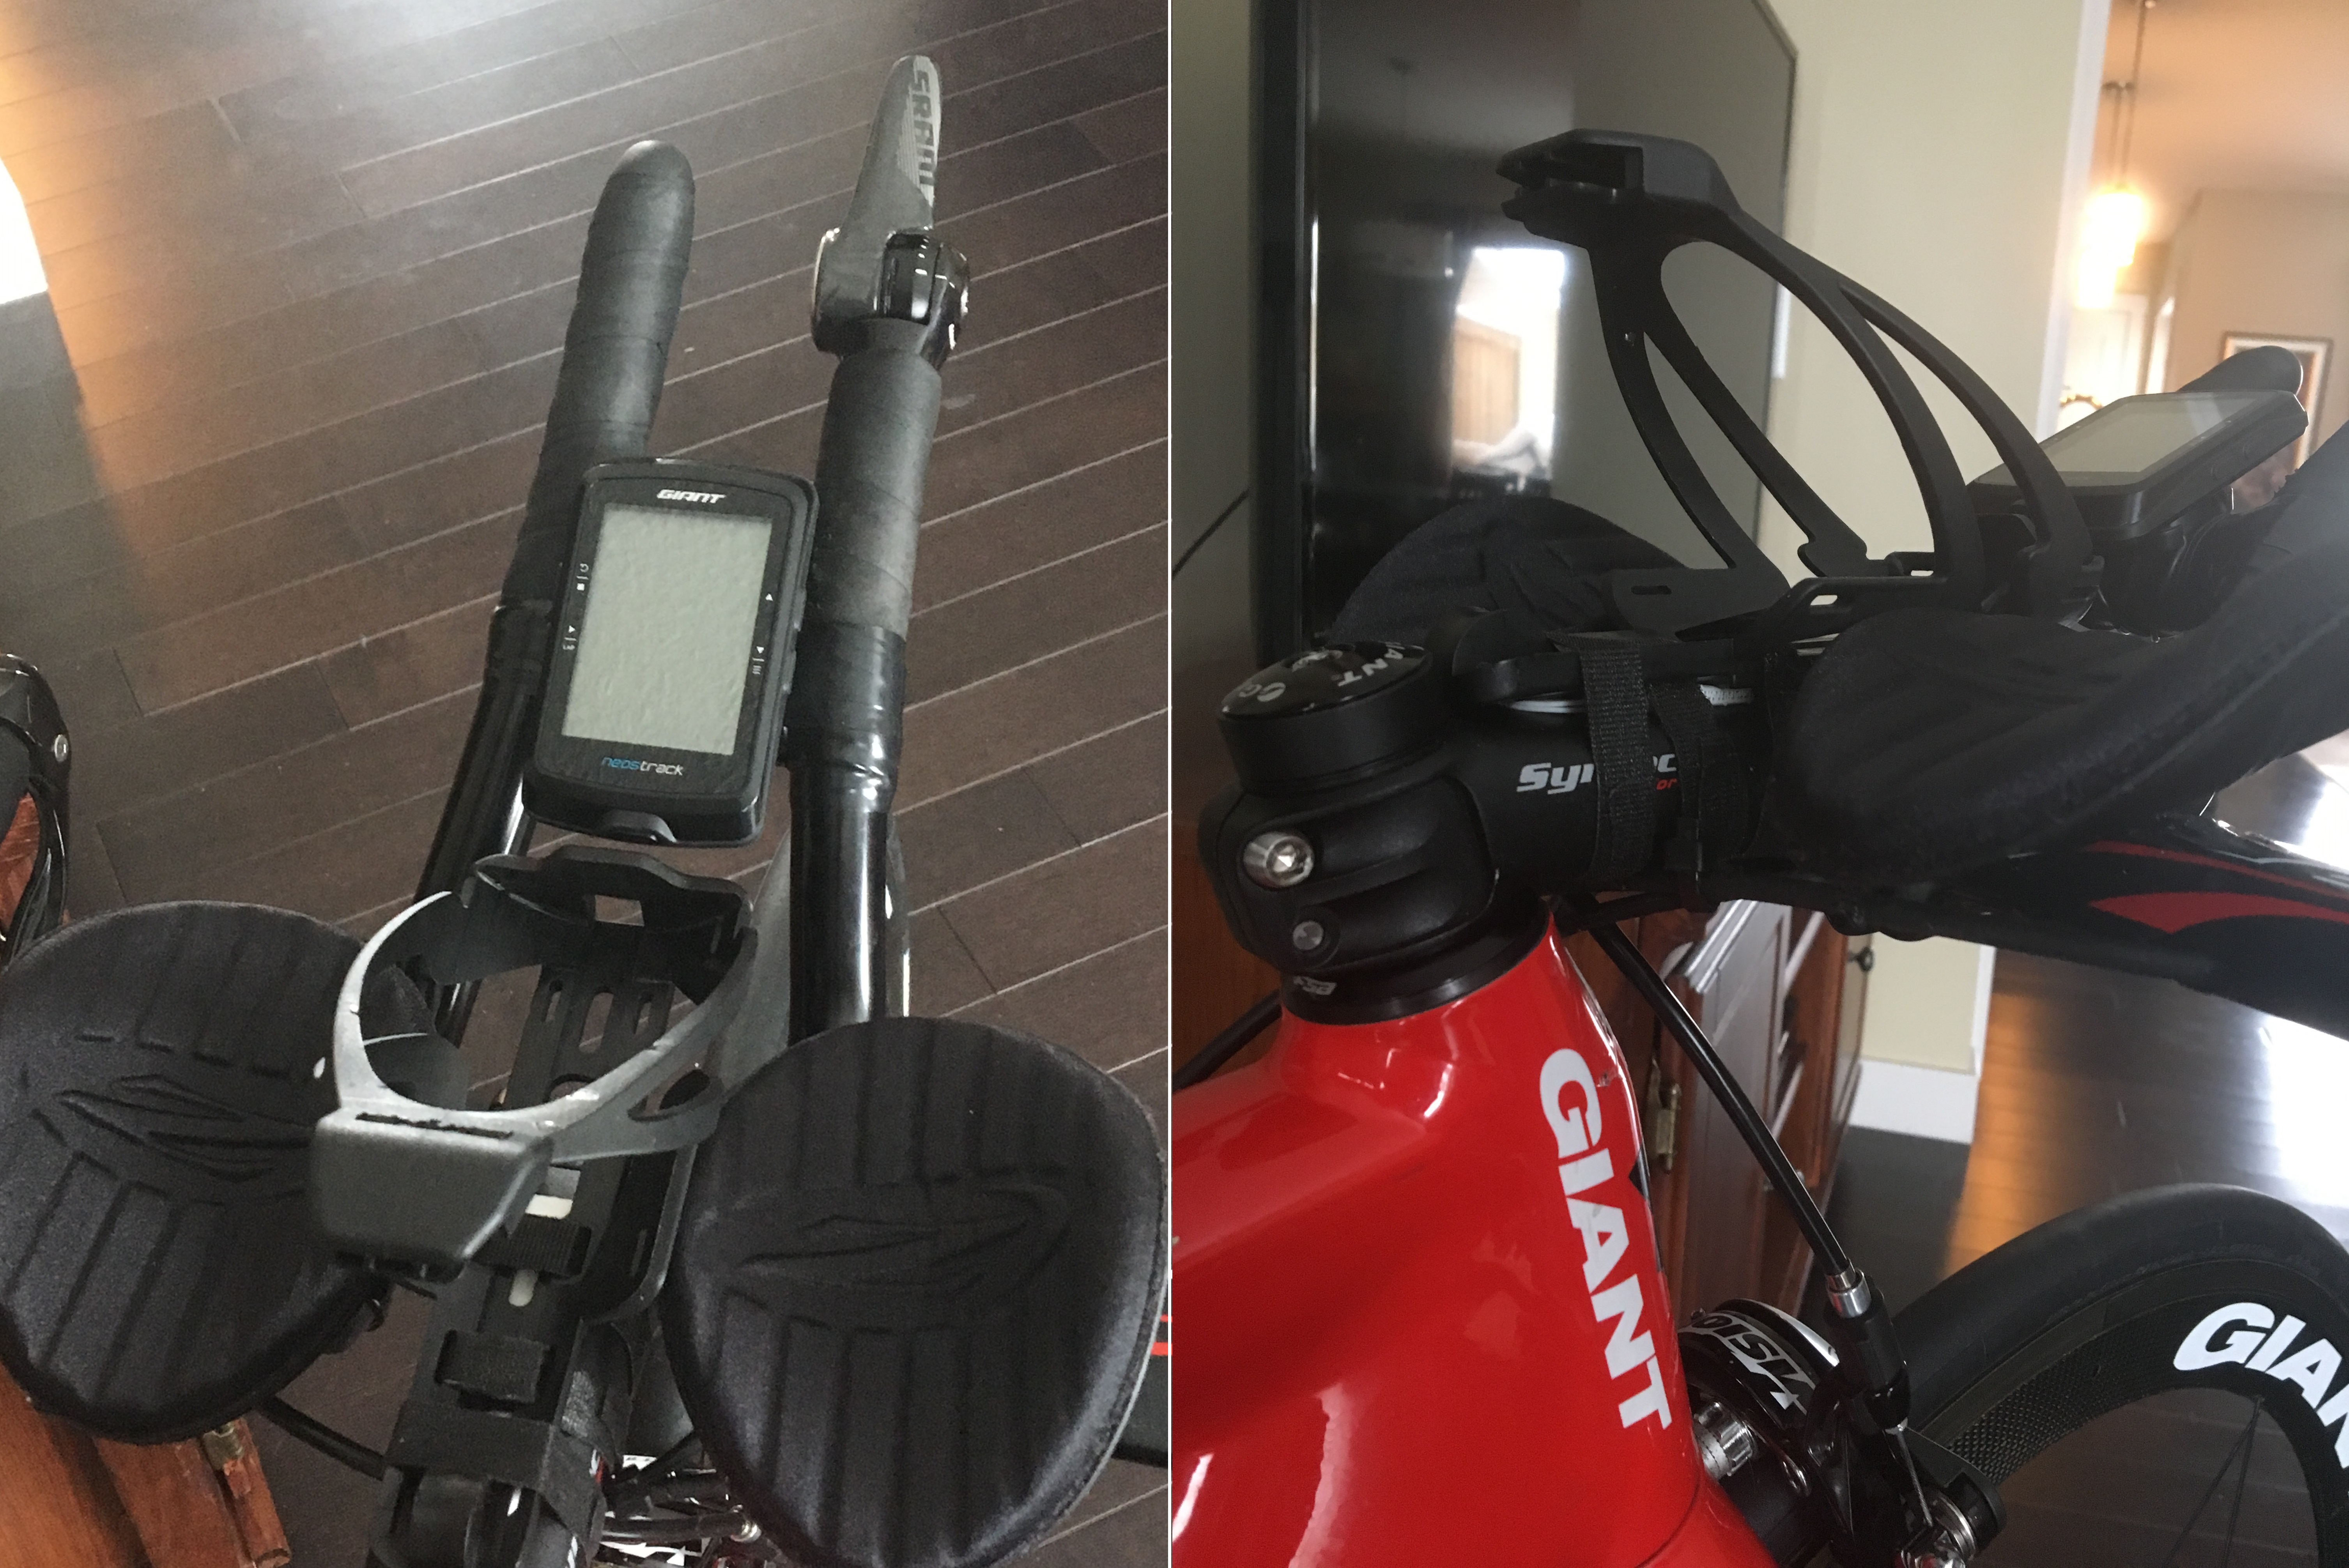
Every good bike review starts with the cockpit, since this is the first piece that the wind sees. This one has seen a few iterations, as I struggled to find the right fit. That ended up being an old friend…an alloy Felt Bayonet bar that I bought for $40 on Slowtwitch for my B16, one that I thought was lost to a stripped armrest bolt until just recently. I kitted this underrated basebar with Zipp Vuka Alumina Evo 110 extensions and armpads, for a comfortable high hand position.
FINISHING KIT
The cockpit is finished off with some interesting pieces that I found during an Internet deep dive. The Syntace FlatForce 99mm stem allows me to get addition drop on the cockpit, thanks to the 27mm stack height, -17 degree pitch and additional 12mm drop at the clamp attachment. My right extension is cut shorter than the left to accommodate a SRAM R2C shifter. The final touches are a Speedfil Z4 bottle cage (mounted backwards with velcro cable ties), Shimano PRO Control bar tape (my go to TT bike tape thanks to its grippiness and ability to stretch to half its normal thickness), and a simple yet powerful new Giant Neostrack computer.

WHEELS & BRAKES
When it comes to everyone’s favourite aerodynamic “upgrade”, I have simple tastes. I’ve now owned 2.5 sets of these 2009 Bontrager Aeolus 5.0 carbon clinchers. They’re narrower than modern aero wheels, plus they fit my frames and were dirt cheap ($500). In fact, I have a matching set (with a Powertap hub) for my road bike that I got for the same price. Everyone knows the real bang for your buck is in tires and tubes! Pictured here are Michelin’s Power Competition tires to train on, though I intend to race on other products. Currently, I add a Wheelbuilder Aerojacket cover to my rear wheel for racing. Braking is handled by Vision’s Trimax Aero Brakes, which are at worst an aerodynamic wash with potential, and the price was right. There might be a TriRig Omega in my future, however…if I can find a good deal!

DRIVETRAIN
Which brings me to my favourite part of this build: the drivetrain. The cherry on the top of my SRAM Rival 1x set-up is the WolfTooth Components 52t DropStop chainring, the only round 52t ring on the market for 110bcd cranksets. The two extra teeth will allow me to spend more time in the middle of my cassette, rather than in the small cogs. I will run a SRAM 11-28 cassette in most cases, with an 11-23 for dead flat course and an 11-32 for hillier courses. The rear derailleur is a cool piece of road kit, coming with a clutch and 12-tooth narrow/wide pulley wheels for chain retention on those chippy Western Canadian roads. Power is measured by a Quarq Riken AL ($500 used) with 165mm cranks. The chain is KMC, treated with various Muc-Off products for training.

SADDLE AND HYDRATION
The last little details are the fruits of other Internet deep dives, some more successful than others. After trying a few options, I settled on a Fabric Tri Elite saddle for the integrated rear bottle cage holder. I don’t foresee using a rear bottle much for racing, but it is a good option for training (and my next Powerman). A noseless saddle has been my preference since I switched to ISM 5 years ago. A Giant cage with good retention holds my bottle. On the frame is a Torhans VR Aero Bottle, with the bottom of the bottle (not pictured) cut off. I will use this to hold my flat kit. For UCI-governed time trials, I will replace this with an Elite Crono CX bottle (if needed).
IS IT THE FASTEST BIKE OUT THERE?
Probably not. If I ever switched my focus exclusively back to non-draft racing, I would be due for a frame upgrade. I also chose to set this up to be UCI legal, to keep the joys of racing time trials as a race option. This explains the saddle setback and short extension reach, and results in a slight position compromise. This decision also informed some of my part selections. What I do know is that it was a joy to painstakingly build and ride what is definitely going to be a unique bike in every transition zone. It’s simple and easy to maintain and travel with, oozes my personality in every part, and fit my budget splendidly. No doubt more tweaks are to come (current specs below). Until next time, keep Du’ing it!
FULL SPECIFICATIONS
$400 – Frame/Fork: 2007 Giant Trinity A1 (50cm)
$40 – Basebar: Felt Bayonet Alloy
$160 – Extensions/Armrests: Zipp Vuka Evo 110
$125 – Stem: Syntace Flatforce (99mm/-17 degrees/12mm drop)
$500 – Crankset/Powermeter: Quarq Riken AL (165mm)
$110 – Chainring: WolfTooth DropStop (52t/110bcd)
$120 – Rear Shifter: SRAM R2C
$110 – Rear Derailleur: SRAM Rival 1 (medium cage, clutch)
$40 – Chain: KMC (11 speed)
$100 – Cassette #1: SRAM PG-1170 (11-28)
$60 – Cassette #2: SRAM PG-1130 (11-32)
$65 – Cassette #3: Shimano Ultegra 6800 (11-23)
$189 – Brakes: FSA Vision Trimax TT
$60 – Brake Pads: Zipp Tangente Cork
$500 – Wheelset: Bontrager Aeolus 5.0 (50mm depth)
$150 – Disc Wheel: Wheelbuilder Aerojacket
$120 – Tires: TBD
$70 – Pedals: Shimano R550
$85 – Saddle: Fabric Tri
$25 – Bar Tape: Shimano PRO Control
$60 – Hydration: Speedfil Z4 (BTA)/Giant (BTS)
$35 – Flat Kit: Torhans VR Bottle (seat tube)
GRAND TOTAL (approximate, includes consumables) – $3125. Fun fact: building doesn’t always save you money over buying a complete bike.
